Wednesday, May 23, 2012

Hey Nice Wall!

My "Masterpieces" wall decal arrived and look how cute it turned out?

I might add that I did this project at 7:15 am last Saturday because the baby was up.  If that's not enthusiasm for crafting, I don't know what is!

Now I need to decide if I'm ok with tape on this Masterpiece Wall, or whether I'm going to go craftier with spools and twine and clothes pins?  Decisions...

Saturday, May 19, 2012

Door Knob Problem Solved- Yipee!

Remember last week when I blogged about my doorknob dilemma?  Well on Friday, I was beyond excited because I decided after much debate, to pull the trigger on a set of Victorian knobs from stiickaround on etsy!  I went back and forth on these for a bit because they are going to need some serious TLC/elbow grease to bring them back.  But just LOOK at the molded details on those puppies!  They are (1) the correct age, (2) pressed metal, (3) all matching and (4) will work with our doors.  Yessss!  Some of the knobs in the set are brass and some are copper.  Copper!


There are some plain knobs in there too- perfect for closets.  In fact, there are enough knobs in this bunch that I can redo every single one in my house.  Goodness gracious, I sure do derive a lot of pleasure from eradicating new fixtures from an old house!

I even found a resource for affordable reproduction rosettes that will fit the bill-- but first I'll have to clean these and see what the original finishes look like before I go ordering rosettes.  What a relief it is to have found something so perfect.  Fingers crossed they work as well as I think they will (I've already found some good tips online for cleaning copper and brass).  Let's take a moment to savor this.  Hello lovelies!


Got any fun projects in the works yourself?

Wednesday, May 16, 2012

A Bridal Shower In-A-Box

What do you do when a friend- an awesome, wonderful, dear old friend- is getting married and insists she does not want a bridal shower?  Oh and, you can't attend the wedding due to a family conflict?  For me, it created a lot of guilt!  I wanted to find SOME way to celebrate the big day, and another friend who also couldn't attend the wedding felt the same.  So we put our heads together and came up with an idea- a bridal shower in a box!

Our box had an invitation on the cover and contained a "Congratulations!" sign, a custom screenprinted vintage hanky and seahorse bride tank top from Wedding Chicks (more on their goodies in a future post), a big Bachelorette wine glass, some obscenely impractical bridal undies and an eye pillow, and some goodies from Philosophy (including a "Purity" face wash for good measure, ha!)


We presented the box over margaritas and my friend loved it!  Hooray!!  I am so happy for this friend and cannot WAIT to see those wedding photos!!

Monday, May 14, 2012

Masterpieces!

Now that I have a toddler, I'm finding that I accumulate children's artwork pretty quickly.  My nanny has a son who is 9 months older than my daughter, and Friday's are art days for them, which means double the love, double the art!  The obvious upside to this is that I get plenty of adorable masterpieces.  The downside is, I have almost no room on my fridge. 

Enter the google images search.  I found so many cute ways to display kids art in your home, but the "masterpiece" walls are absolutely my favorites!

from Johhny In a Dress

from Lesle's Life
Needless to say, I'm thoroughly smitten, and the other day while looking at a blank, purposeless space in my kitchen it hit me- I'll use it for a masterpiece wall!

See the arrow?  That is the future location of our masterpiece wall!

 So as soon as inspiration hit, I went to etsy (duh) and ordered this lovely little decal from madebytheresarenee.  I ordered it in celedon to match my vintage kitchen gadgets, and I think it's going to be adorable!


Click here to get one of your own!
  I can't wait to share how it comes out.  And for only about $10, including shipping, such a steal!  Now I need to figure out how all this artwork will be hung-- any suggestions?


Friday, May 11, 2012

Silhouettes Repurposed Yet Again

I am a lover of repurposing things I already own.  And I am a lover of antiques.  It just so happens that I have a small collection of silhouette pictures from my childhood, and I've always tried to find a place for them wherever I live.  It helps that silhouettes have been in vogue lately, but I would love them anyhow.  In our previous home, we decorated with them in our guest room:


Later when it became a nursery, I only had room for one, and we HAD to have ONE!


Well, in our new home, I was recently faced with a design challenge.  I needed something large-scale to hang above Claire's crib on the HUGE wall behind it.  We have luxiously high ceilings, and big spaces are nothing to complain about, but I'm not used to it yet!  And all my decor is small-scale because our first home was tiny.  So to address my wide open wall, I tried hanging a quilt above the bed but it just looked funny, and still didn't take up enough horizontal space.  I thought about buying a couple of big circus posters from Pottery Barn Kids too,

but of course this did not fit the "cheap or free" decorating mandate from my husband.  Which I am unfortunately forced to take seriously.  I started brainstorming... I do have lots and lots of fabric.  What if I framed it?  I've seen this done a thousand times on pinterest.
See http://pinterest.com/pin/64246732154433176/

See http://pinterest.com/pin/112871534380449830/
Brilliant!  I decided to go for it.  I hit up the Christmas Tree Shop (my favorite go-to place, you'll see I talk about it allllll the time) and scored these amazing weathered wood frames for $5.99 each (and I came armed with a 20% off coupon)!  Of course, I still needed to add more pink, so I picked up a spool of ribbon, thinking I might decorate the frames I bought.  And then it hit me-- I would "hang" the pictures using the ribbon, to bring in more pink and tie the look together.

Ta da!
I used pink and white polka dotted fabrics that had previously lived another life as a table cloth (speaking of repurposing), and the project took all of 5 minutes to assemble.  Not bad for $15 and some things I already had!  And by the way, I love instagram, and how it makes my iphone photos look artsy.  Now I just need a use for my other silhouettes...

Have you repurposed anything fun lately?

Thursday, May 10, 2012

An Ice Cream Cake Hack

In my last post, I talked about the hobby horses and today I'd like to share with you a little project that had big payoff for me: Claire's birthday cake.  As originally envisioned, Claire's cake was to be homemade by me, presented on a special glass pedestal with strawberry filling and the tastiest cream cheese frosting I know how to make.  But then, we sold our house.

Given that we were to move the day after Claire's birthday, I did something drastic.  I bought a Carvel ice cream cake.
For someone like me, buying a store bought cake for your daughter's first birthday is sacrilege.  (A) It is not homemade, (B) it doesn't go with my colors and (c) it's honestly not that attractive.  So I did what any stressed out, overachieving, avoiding-packing mom would do-- I bought more icing.  Of the Wilton Ready-to-Decorate variety.  In pink and black.
Here's how I did it- using plastic knives and extreme caution, I carefully scraped off all that blue.  It doesn't even taste good, so at least I didn't feel tempted to eat while scraping!  This took a while, so I had to put the cake in the freezer for a bit to keep it from melting, but it was easy enough to do.

Next, I went to town with the icing-- since Carvel seems to have success with their scribbly icing method, I basically did the same.  Only I had to scribble a much larger surface area to hide all that cookie monster blue (hmmm...maybe for next year's birthday?)

And of course I had crafted a few paper decorations, and purchased a FABULOUS chalk board horse from Houndstooth Design on etsy as the piece de resistance.


Sometimes in life, bad things happen to good people.  Like me having to move the day after Claire's birthday (poor me right?)  But then, sometimes those bad things happen for a reason.  And the reason here is clearly so Claire could have an awesome birthday cake.  I love how it came out!  And for so much less effort than homemade.


Too bad Claire didn't actually eat any, poor baby was not at all in the mood.  One more reason I'm glad I didn't slave over this one!


How about you- have you tried any successful hacks lately?


Wednesday, May 9, 2012

Hobby Horse Party Favors

My daughter Claire turned one in March, and since then, every friend or colleague who has seen the photos has asked me how I made the hobby horses that each of the kids received.  To start, I want to disclaim that only 3 children of hobby-horse-age even attended the party, and one of the three was Claire, so I didn't exactly have a slew to make.  Nonetheless, make them I did!


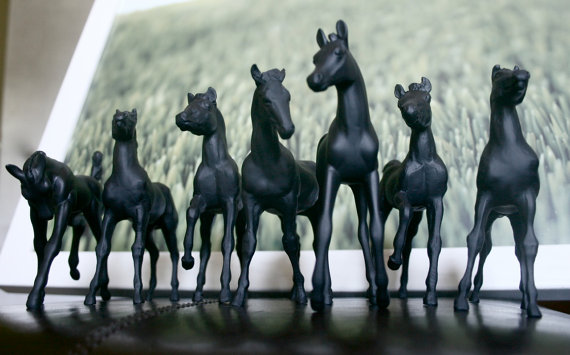
Originally, I had hoped to save some of my precious time buying horses from an etsy vendor.  And while there are so many cute ones to choose, from, none were in my price point.  If I WAS going to buy from etsy though, I'd buy one of these arabian versions, my goodness they are pretty!


Fortunately eHow came to the rescue with a series of wonderfully helpful tutorial videos.  I won't repeat the instructions here because the videos do a much better job.  But I did make a few adjustments that are worth noting:

(1) Rather than sew plush ears, I included the ear in my silhouette pattern of the horse head.  Does this make the horse look like a unicorn without ears?  Arguably.  But these are 1 and 2 year olds, I didn't think they would notice.

(2) I sewed buttons on for eyes.  In fact, all of my materials were things I had lying around, including the fabric leftover from other projects. 

(3) I added bridals to my horses.  They are not really horse-accurate in their design, but as an equestrian myself, I knew my horses needed some tack.

(4) To attach the horses to the sticks, I staple gunned the "neck" fabric to a wide wooden dowel, and then gathered with thread and covered my tracks with ribbon.  This held up very sturdily for me and looked cute.

(5) Blue ribbons- what horse show would be complete without them?!  Mine weren't blue, but they worked well- they were made by accordion folding 2 inch wide strips of paper, gluing them end to end, flattening the circle, and then adding a paper disk to the center.  I then cut paper tails and used sticker letters to apply each child's initial.  I used safety pins to attach the ribbons to the horses and denote which horse belonged to which child.  This was a small touch that was noticed by adults only.  And that's just fine with me.

My favorite part of making these ponies was making the manes.  Who knew stuffed critters could be so doable?  This is probably not a project for a beginning crafter, but it wasn't as hard as I expected.  Go forth and make ponies, see for yourself!

Tuesday, May 8, 2012

Vintage Door Knobs: Can-Do or Can of Worms?

Recently I purchased a lovely porcelain door knob from Ruby Lane, to use in my powder room.  You see, our home was built in 1904, but is almost entirely occupied by shiny gold, brass knobs circa 1990.  Not my personal favorite thing.  So back to this door knob I purchased.  It was in great shape with white porcelain knobs and the original porcelain rosettes (the pieces that go against the door and hold the knob- harder to find) and it was $20 which costs less than some new knobs you see at Home Depot.  I was proud of how thrifty I was being, and how true to the historic roots of my home.

The precious

The dream has died.  I discovered, much to my chagrin, that my antique doors had been drilled into, with big huge holes, to accommodate modern door knobs.  Thereby ruining my life.  Some people are so selfish.  I was very disappointed to learn this sad truth.  It means I can't just go buy vintage door knobs to swap out (like I had done in our previous home).  No, instead I have to find specially made rosettes which convert the modern bored hole into one that can hold a vintage door knob.  I am not the first person to come across this problem (see a very helpful post on the subject from The Brass Knob) but I may well be the most vocal.

The good news is, such rosettes are made by many companies.  My current favorite version is sold by House of Antique Hardware and is of course, about $20 a pop (at 2 per door, with 12 doors, you can see how this becomes a runaway cost train pretty quickly).  You can buy less pricey versions in polished brass, but that ain't gonna work- I want antique brass.  I need to find a more cost effective solution.

And then I need to find 12 doorknobs like these:

Source: Columbus Architectural Salvage
Drool.  Only, I need to do this project for a lot fewer dollars.  This is one itch that I may not be able to scratch right away.  My dad auctions off estates sometimes, so I may get lucky.  Or not.  Let the brainstorm begin (I welcome your suggestions!)


Monday, May 7, 2012

Before and After: Window Treatments!

Well hello everyone!  I'm Sarah- a newish mom to 13 month old Claire, and a proud new homeowner.  I also have a day job-- not a lot of "free time" per se.  But as you will soon see, that generally doesn't discourage me (though sometimes it really ought to).

So in my new home, I've been spending some dollars.  Quite a few.  Husband says no more spending this month-- so I'm filling my time with a lot of low cost or no cost projects.  And that is why, when I came across this amazing tutorial at The It Girl Project, well, I was PSYCHED! 

My mother-in-law made a similar shade in her kitchen, but she's really good at that sort of thing, so I wasn't sure if I could manage it.  Well, I'm here to tell you, anyone can do this.  It Girl used Stitch Witchery (definitely check out her tutorial for the step by step) whereas I just sewed some straight lines, but I love how you could really do either and have it work well.

Now are you ready for the magical before and after goodness?  OK, just please excuse the iphone images, it's all I had handy...

BEFORE: Note the baby up to no good!

AFTER: Lighter, brighter, and super cute, no?

AFTER: Because you know I had to do the kitchen sink...

One of the things I did to make my own life easier, was I used a double-sided fabric, which saved me from needing to add a liner.  My fabric was $8.99 a yard on sale at Joann (x 3 yards), and then I purchased dowels ($.59 each), and curtain rods ($3.99 each) for a grand total of about $14 per window.  My curtain rods have bright brass finials, and those will be getting a paint treatment in the near future, but for now, I'm just plain thrilled!

Have you ever tried DIY window treatments?  I'd love to hear what others have done!


We've been talking about it forever, and now we are doing it!  Welcome to our blog!  This is our new home online, a place where we will share with you our sometimes-hare-brained, sometimes-brilliant ideas for decorating, party planning, and otherwise avoiding our real work.  Cheers!